Software
Viewer software
In the previous section, you learned about the hardware used and how to connect Viewer clients with a Recorder. Now, let's explore how to set this up in the software.
Installation
You can get your copy of the Viewer on FairReplay cloud. To do this, you will need to register. Learn how to register here.
You have two options for downloading. Either you download a stable version or a preview (beta) version. Preview versions usually include new features, and you are welcome to try them and report any possible bugs.
Download of versions is available here.
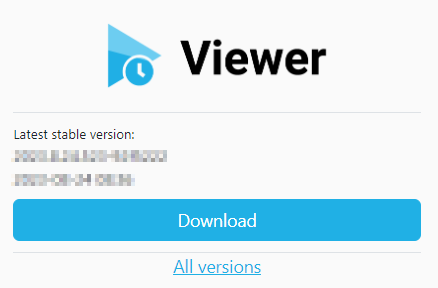
The Download button initiates the download of the stable version, while the All versions link directs you to a list of all publicly available versions.
Once the program is downloaded, open the installation file.
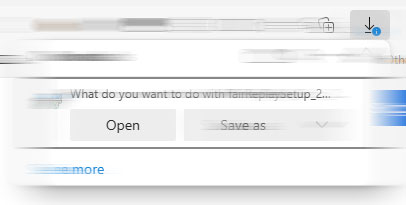
Installation is automatic, and once started, it will install (or replace) Viewer with the newer version that you just downloaded.
Once installation is complete, an icon will appear on the desktop.
How to start the FairReplay Viewer
Double-click on the FairReplay Viewer icon on the desktop. You can also find the program by searching for 'Viewer' in the Windows Start Menu (by pressing the Windows key on the keyboard).
Recommended! Prepare Windows for Best Performance.
Main Interface
Once the Viewer has opened (which may take a few seconds), you will be welcomed by the main interface.
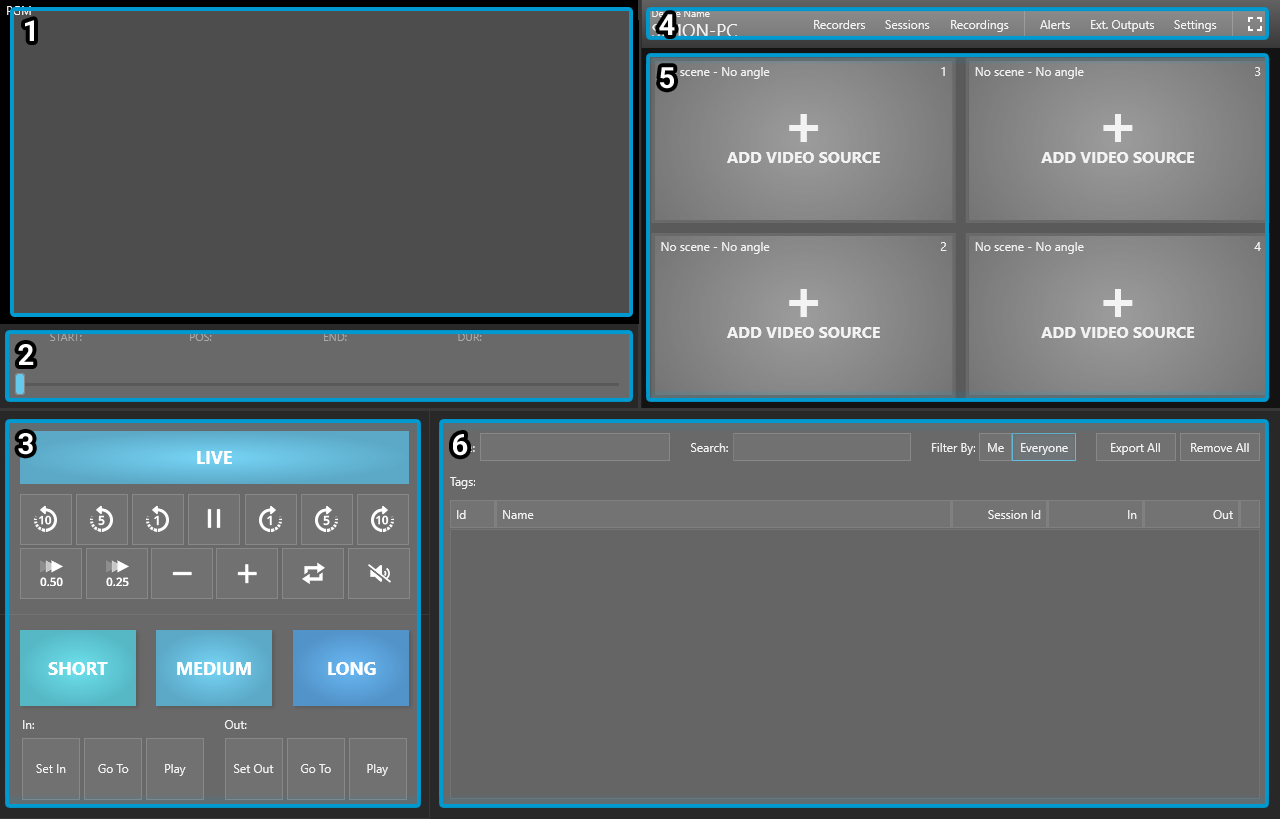
1 - Main preview
You will see the current picture from where the timeline is currently positioned. This is also the output for the selected output. See more in the Outputs section.
2 - Timeline with slider
You can navigate through the available time space using the Slider. You can also see different times, such as the start of the current recording, the exact position with timecode, and the time of day. For more information about the timeline, refer to Timeline info.
3 - Quick access buttons
Buttons, such as Go to Live, 1, 5, 10 seconds back/forward, Create Short/Medium/Long events, and Set In/Out, are positioned here.
4 - Menu section
Your computer name, together with quick access to Recorders, sessions and recordings are here. You can also quickly navigate to alerts (which is red if something is wrong). Settings, quick external outputs screen, and full-screen mode are also available here.
5 - Multiview
By default, all selected recordings are shown here at the same point in time selected by the timeline. You can select or change them with a right-click. See more about How to Select Recordings?
Selected Recording
- Selected Recording Panel by ID in MultiView
6 - Events
You can see list of created events here. In this section, you have the option to rename events, search for specific events by title or tag number. You can also filter the events based on the creator, whether they are events you created yourself or all events. Additionally, quick access buttons for exporting all and removing all events are available in this interface.
Select Recorder
Once you are familiar with the main screen, go ahead and click on any empty video source (panel 5) or select a Recorder (panel 4).

1 - Found Recorders on same network
Each Recorder sends out a discovery packet which viewers are listening to. If you encounter any issues, such as the Recorder not appearing or showing as offline when you know it is online, refer to the troubleshooting section for discovery.
2 - Currently selected Recorders
Recorder(s) that you have previously selected are listed here. You can also identify if this is the Recorder running on your PC by checking the This PC remark.
3 - Manually add Recorder by IP
If, for some reason, such as misconfigured network firewall, the Recorder is not found, you can add it here.
Once you have selected at least one Recorder, proceed to select a session.
Sessions
If you have not chosen any Recorders yet, click on an empty view in MultiView or click on
Sessions that are available on selected Recorders see how to create session here are displayed on the screen. You can select multiple sessions, we do however recommend to work with only one. Session is activated as soon as the checkbox is checked.
Changes made in selecting or unselecting sessions are saved upon closing the Select Session window!
When you unselect a session and close the window, its events and recordings are removed.
(Optional) Refresh Button and Status
- Status is uutomatically refreshed every 60 seconds. You can manually refresh if needed.
- For example: (10.58.40.4 OK) indicates the time of the refresh and the status.
Recordings
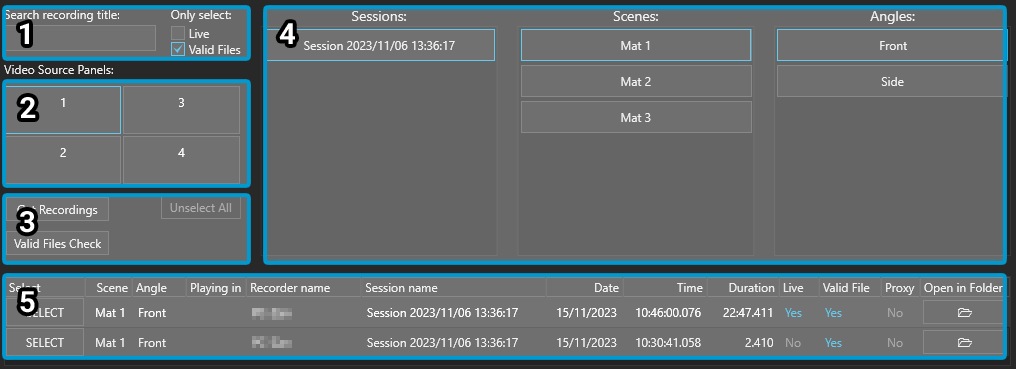
You have multiple options on this screen:
1 - Filter by text (scene, angle, date and time). You can also filter by Live and Valid recordings what is a valid recording.
2 - Panel select - choose the panel for the recording.
3 - Quick access buttons - Force refresh all recordings, re-check file validity, and unselect all recordings from panels.
4 - Quick filter - filter by all available sessions, scenes and angles.
5 - Recordings - filtered recordings are shown here, sorted by newest on top.
You can select any video source panel (panel 2) and then recording (panel 5) without closing the window.
Valid recording
A Recording that has a file that exists and is accessible over the network, is considered valid. If you encounter a recording that is not valid, you can refer to the troubleshooting guide for assistance.
Scenes and angles
What is a Scene - In the context of a sports event, a scene could represent different fields in a football game, like Game 1, Game 2, and Game 3. In multidisciplinary sports, scenes might be designated as Field 1, Field 2, etc. For reality shows, scenes could be labeled as Room 1, Room 2, Room 3, and so on.
What is an Angle - In the context of a football game, angles could represent different perspectives or locations, such as Goal Left, Goal Right, 16m Left/Right, and Center. These angles provide specific viewpoints within the event.
How to operate the viewer
When you select at least one recording in MultiView. You have multiple options for navigating through time, which are explained below.
Meaning of information above timeline:
START: The start of the timeline. It represents the earliest recording starting time among the recordings in MultiView 5.
POS: The current time position of the selected recording.
TC: The TimeCode of the position of the the selected recording.
END: The end of the timeline. It represents the latest frame time among the recordings in MultiView.
DUR: The duration of the selected recording.
100% Represents the current playback speed as a percentage.
Navigate with the mouse
The mouse can be used to scroll through the timeline by pressing and holding the slider or by using the Quick Access Buttons.
Normal Playback:
Playing an Event:
- When playing a previously created event, an additional 5 seconds are included before the event's IN time and 5 seconds after the event's OUT time. Set the picture above.
What is the Playing Event Loop?
When playing a previously created event with the 'Playing Event Loop' option enabled, once the current time reaches the OUT point of the selected event, it loops back to the IN time.
Live - What does this button do?
Exit Event (Displayed when playing an event) - What does this do?
Move Backwards by Seconds
Move Forward by Seconds
Play/Pause
Playback Speed
Move Frame by Frame
Playing Event Loop - What is Playing event Loop?
Mute - Toggles Mute for Main Preview
Create Events - What is an Event? see here

IN/OUT
Set IN or OUT
Sets the selected event's IN/OUT time.
While playing an event:
- sets the Playing event's IN/OUT time.
While in normal playback mode:
- Creates a new Default Event from IN/OUT.
Go To IN or OUT
Goes to the selected event's IN/OUT time and pauses.
Play From IN or OUT
Starts to play from the selected event's IN/OUT time.
Navigate with the keyboard
Most important default keybindings:
← → | Move frame by frame |
Ctrl ← → | Move 5 seconds backwards or forwards |
| Play/pause | |
U | Create event |
P | Play event |
More keybindings are listed here.
Navigate with the console
Viewer supports multiple control devices, including X-Keys, JLCooper, and Shuttle eXpress. See more here.
What does the Live function do?
The Live function checks all Scene-Angle combinations in MultiView. It checks if a newer recording is available for the same Scene-Angle combination and loads it.
When a newer recording is recording at the moment, it goes to the LIVE TIME.
When a newer recording is finished, it goes to the start time.
When playing the latest recording, and it is still being recorded, it always goes to the LIVE TIME.
What is LIVE TIME?
It represents the closest time to what is happening at the moment on the field you are recording.
You can adjust the Live Delay in Settings.
Pressing the Live button always exits an event.
When the Live button is pressed, the system loads the latest recordings. It includes recordings that are currently recording and all recordings that have been stopped within the last 9 minutes of the LIVE TIME. If a recording was stopped more than 9 minutes ago, it will not be shown.
You can change the default 9-minute threshold in the settings.
What does Exit Event Function do?
- The "Exit Event" function allows you to exit event play mode while remaining at the same position on the timeline.
Events
What is an Event?
An Event in the context of the Viewer is a way to mark and save interesting segments in a video. It involves setting an IN (Start) and OUT (Stop) point to define a specific portion of the video.
Events save all recordings from the Multiview in various angles for quick playback and exporting purposes.
Events table with easy access filters and controls
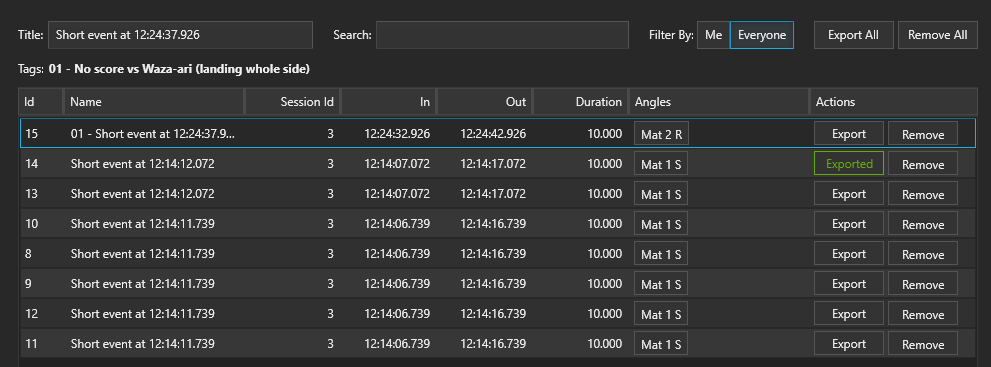
Event Row Definitions
- ID - a sequential number assigned to each event for identification purposes.
- NAME - a name of the event. You have the option to rename the event. Next to the name is the Tag of the event, which can also be changed.
- SESSION ID - shows session ids from all recordings selected in angles.
- IN - IN (Start) time of the event.
- OUT - OUT (End) time of the event.
- DURATION - calculated from OUT time - IN time. Indicates the length of the event.
- ANGLES - displays the recordings saved for easier playing of the event. You can click on an angle and it will play the event. Additionaly, you have the option to change angles.
- ACTIONS - Export and Remove
Event Search
- Searches event titles and tag IDs.
Keyboard Shortcut: Press key
Renaming the Event
You can set the event title to anything you want.
Keyboard Shortcut: Press key
Change the Event Tag
You can toggle the tag with:
- Click on the tag.
- Inputing
01+Enter
Press
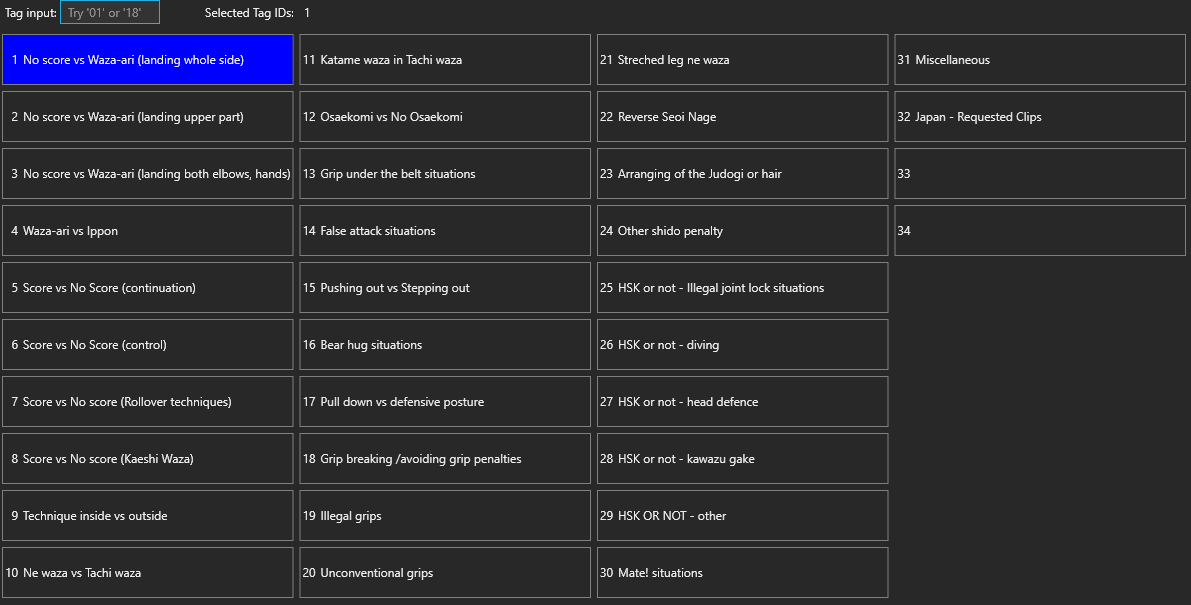
Usefull for:
- Faster event search.
- Tagging the Export videos.
Keyboard Shortcut:
- Open Event Tag Edit: T
What does the Export button do?
Export creates new videos for all angles from the event's IN to the event's OUT.
Exported videos are saved in the folder defined in the Export settings.
If you want to view the export videos in the File Explorer, right-click on the Export button.
Filter By Me/Everyone
- Filters which Viewer created the events.
- Press ME to see Events Created on this computer.
- Press EVERYONE to see events created by all Viewers.
Event Angle Change
List of all available recordings at the time of the event; you can select or unselect them as needed.
Export All
Exports all events shown in the table.
For example, to export all events with a specific Tag, you first search the events and then press Export All.
Remove All
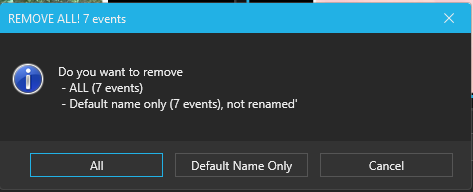
Removes all events shown in the table.
For example, to remove all events with a specific Tag or Name, you first search the events and then press Remove All.
Settings
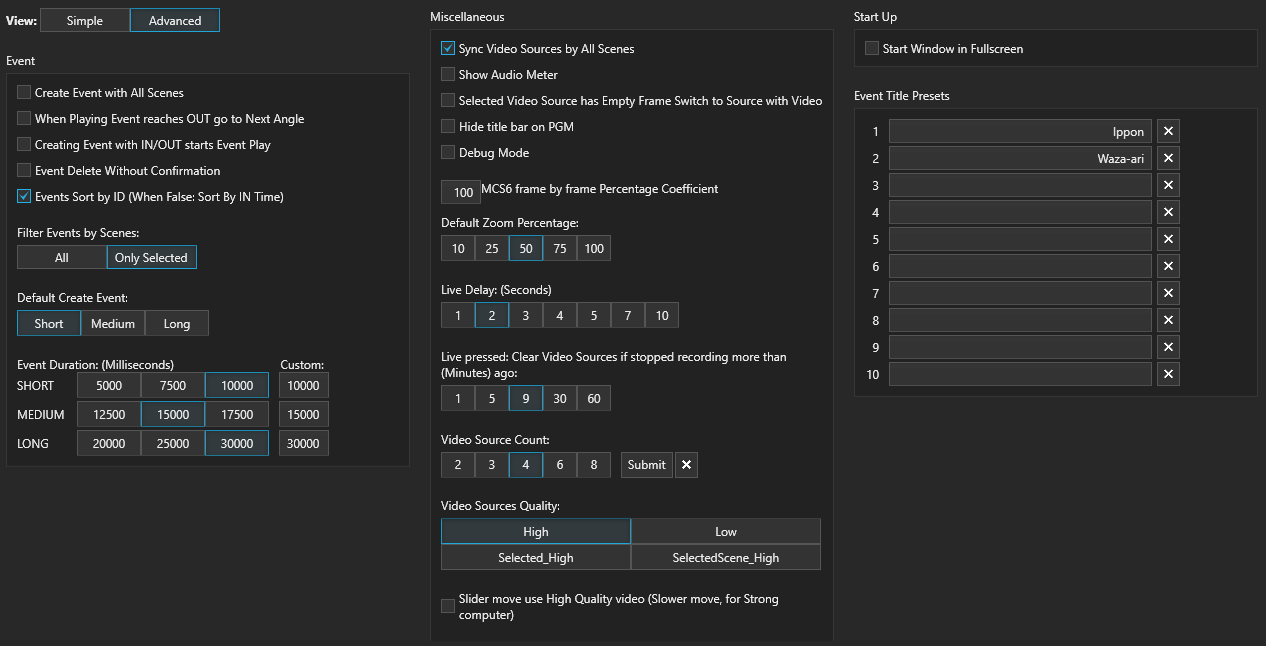
When you open the settings, it opens in the simple view.
To see Advanced settings, press the
Keybindings
Navigate Video
L | Live |
Space | Toggle Play/Pause |
← | Move to Previous Frame |
→ | Move to Next Frame |
SHIFT + ← | Move 1 Second Backwards |
SHIFT + → | Move 1 Second Forwards |
CTRL + ← | Move 5 Seconds Backwards |
CTRL + → | Move 5 Seconds Forwards |
ALT + ← | Move 10 Seconds Backwards |
ALT + → | Move 10 Seconds Forwards |
S | Toggle Slow Motion 50% |
D | Toggle Slow Motion 25% |
Z | Toggle Zoom |
Q | Toggle Quad Preview |
F | Toggle Fullscreen Preview |
Navigate Events
Create Event
X | Default Event at Live |
U | Short Event at the Current Time |
SHIFT + U | Medium Event at the Current Time |
CTRL + U | Long Event at the Current Time |
Play Selected Event
P | Play From IN |
SHIFT + P | Go To IN |
M | From Middle Time |
SHIFT + M | From Middle Time Paused |
SHIFT + I | Go To IN |
SHIFT + O | Go To OUT |
CTRL + I | Play From IN |
CTRL + O | Play From OUT |
Modify Event
I | Set IN |
O | Set OUT |
F2 | Rename Event |
T | Open Tag Edit |
Delete | Remove Selected Event |
Event Controls
K | Toggle Playing event Loop |
N | In the Event Play mode, it plays the next angle from the start within the same event. In the Normal mode, it switches to the next angle. |
SHIFT + N | Switches to the next angle. |
SHIFT + F | Event Search |
SHIFT + L | Exit Event |
↑ | Event Table move UP |
↓ | Event Table move DOWN |
Select Recording in Multiview
1 | Selects Recording Panel 1 |
2 | Selects Recording Panel 2 |
3 | Selects Recording Panel 3 |
4 | Selects Recording Panel 4 |
5 | Selects Recording Panel 5 |
6 | Selects Recording Panel 6 |
7 | Selects Recording Panel 7 |
8 | Selects Recording Panel 8 |
9 | Selects Recording Panel 9 |
External Input Console Preset
Predefined Keybings for External Input Consoles (picture bellow)
How To Change the Keybindings?
First find the action you want to bind to a key combination.
In the example bellow, we will change the Live keybind from the key
With the left mouse button press the cell to select it. The selected cell turns green.
Press the key
Clear the keybind: select the cell with a left mouse click
Press the right mouse click to clear.
Reset All Keybindings to Default: press the button
External Outputs
Output the Main Preview to any detected compatible output.
In Settings -> External Outputs
- Enabled - Enable/Disable the output. Click on the to enable/disable in the Enabled column.
- Name - Your custom name. Click and type to change.
- Type - The device you want to output to.
Output the Main Preview to any Display or any part of the Display you want.
- Enabled - Enable/Disable the output. Click on the to enable/disable in the Enabled column.
- Name - Your custom name. Click and type to change.
- Type - Display ID you want to output to.
- Fullscreen Maximize output to selected display. Click on the to enable/disable in the Fullscreen column.
When Fullscreen is Enabled the Width and Height of the desired output is ignored.
Move non fullscreen output in directions:
- Left
- Right When Left is 0, Right value is taken into account
- Top
- Bottom When Top is 0, Bottom value is taken into account
Export Settings
Alerts
Shows Viewer and Recorder Alert list.
Viewer Alerts
Recorder Alerts
If the alert persists on the Recorder, it will reappear in the Viewer.
Additionally, if the alert is dismisses on the Recorder, it will also be automaticaly dismissed in the Viewer.
System Information
Your computer configuration checks.
Fullscreen
See your Selected Recording maximized.
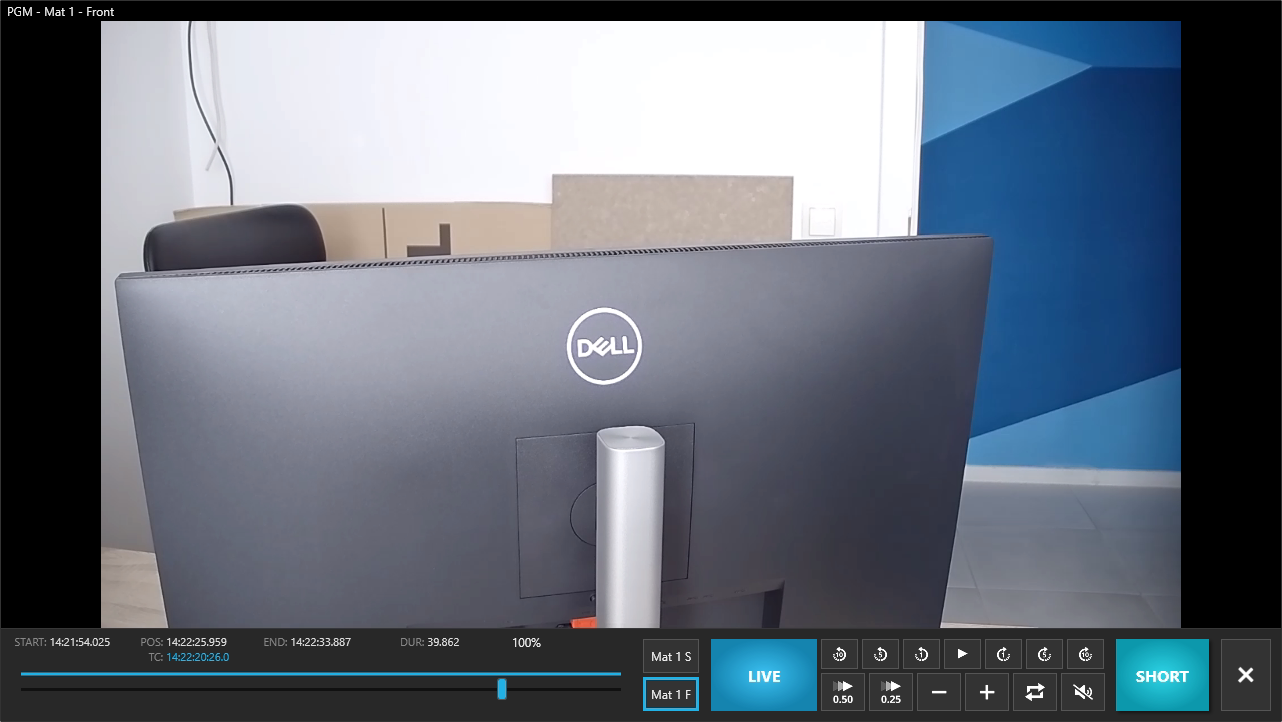
How to operate the viewer? Click here for details.
Changing the Angle
Next to the Live button, you have recording angles that are available.
You can click with the mouse to change the selected recording angle.
Quad
See your Multiview maximized. The selected recording is highlighted.
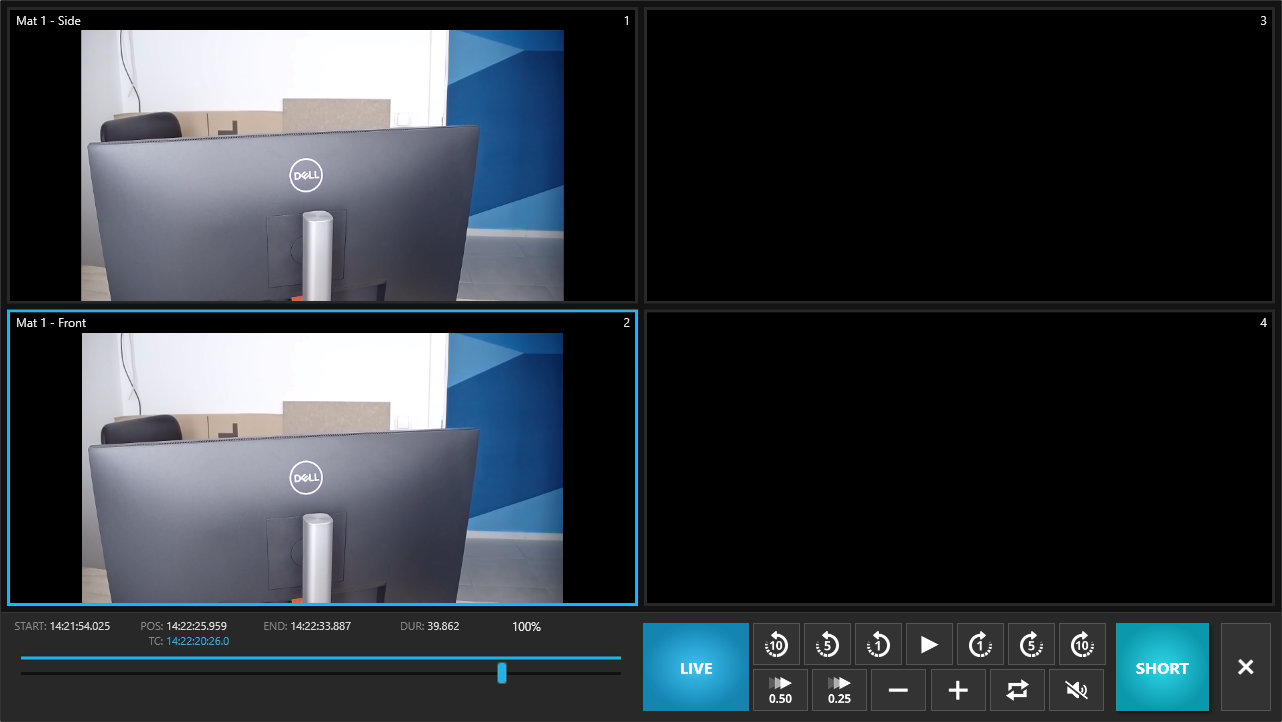
How to operate the viewer? Click here for details.
Outputs Mini
The list of defined outputs you created in Settings -> External Outputs
To Enable/Disable the Output, click on the checkbox.
How to change the Outputs? Click here
Zoom
Zooms in the Main Preview.
Observe the zooming level in the bottom right corner.
Adjust the default zoom percentage as needed in the Settings.
How To Use:
- Mouse scroll:
- Scroll UP to zoom In.
- Scroll DOWN to zoom Out.
- Toggle with the Zkey.
- Move your mouse to navigate the zoomed picture.
An Example With the Zoom:
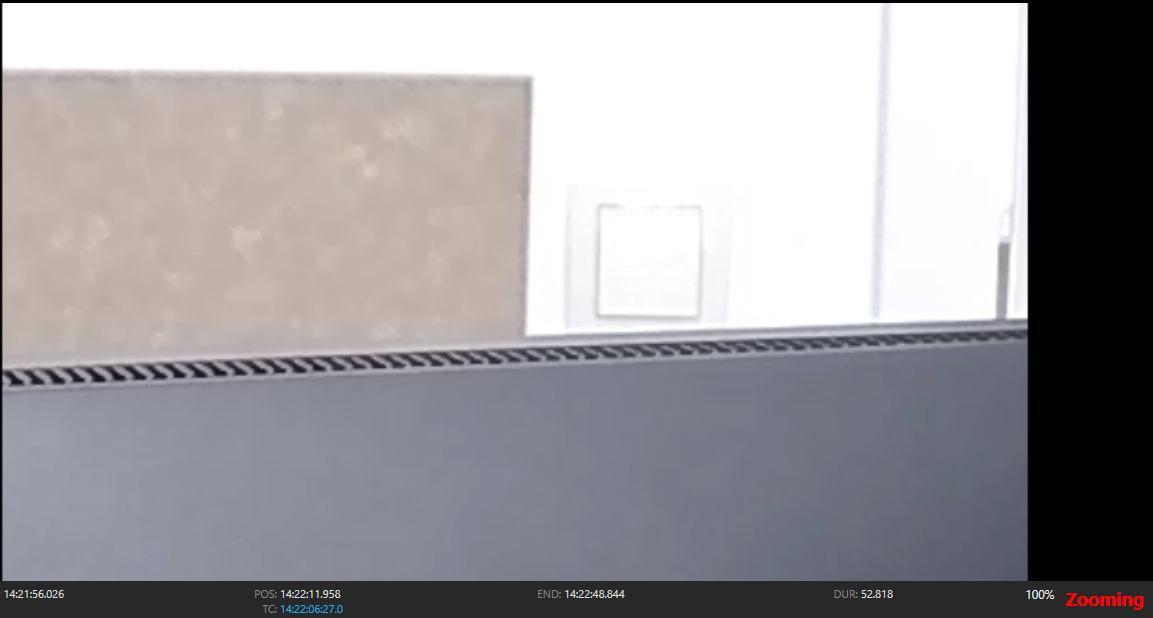
An Example Without the Zoom:
