Recorder + Viewer
This is a guide that will help you connect and run recording with the FairReplay Recorder and Viewer.
You have two options here: one with distributed mode (Recorder and Viewer on different computers) and single mode (Recorder and Viewer on same computer).
First, we will guide you on how to connect hardware and then how to set up software.
Single (1) computer setup
Hardware setup Software setupMulti (2) computer setup
Hardware setup Software setupSingle computer setup
Hardware setup - single
This is a quick setup guide, some details are not here. Refer to full hardware documentaiton for more information.
For this demo we will use:
- A computer with a strong CPU see more, dedicated GPU (see more).
- Blackmagic Quad 2 card.
- Blackmagic DIN - SDI cables.
- Two monitors.
- A mouse + Keyboard + X-Keys Console.
- One SDI Camera with an SDI distributor to generate more signals.
Begin by making sure all devices are in good condition. Cables should look new, especially connectors. Take extra care not to have really tight cables connected to the computer, as you can damage the cable/connector or the computer/capture card.
Start by connecting
Keyboard, mouse and console: - connect them normally to the computer.
Network: - if you have multiple network jacks, try to identify the fastest one - usually it says 10G.
Displays:
When connecting screens, make sure to connect to the graphic card and not to the integrated one. Usually, this is the one away from all the USB/network connectors.
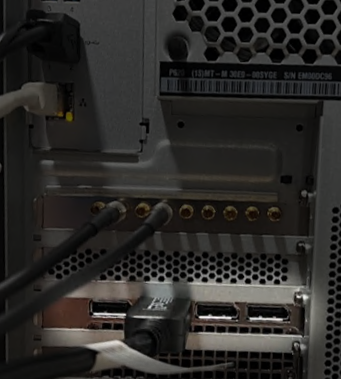
Blackmagic quad 2
Blackmagic DIN cables with small plugs (see picture below) can be damaged if you are not careful when connecting. By default, the Blackmagic card has N+1 SDI connectors. 0 = reference, 1 = input 1, 2 = copy input to output, ...
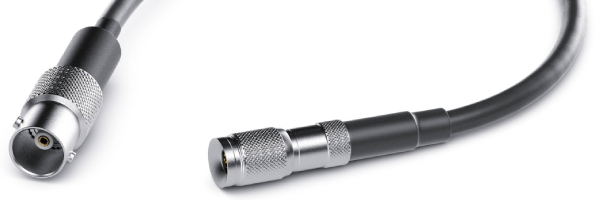

Usually, connector 0 is where there is more space. If you have a PC, this is also the side where USB connectors are.
Connect camera signals to connectors with numbers 1 2 3 and 4. (If you have a mini card with 5 inputs, then numbering is 0, 1, 3, 2, 4).
Camera - cameras can output multiple formats. We will work with 1080 i 50 to learn how to set up the correct deinterlace codec. For most performant and best quality, we recommend to use progressive-only formats such as 1080 p 50.
Network - an internet connection is needed to download software.
Power cable - finally connect the power cable.
Software setup - single
Now that everything is connected, turn on your computer, log in to Windows, and perform a few tasks to prepare for using FairReplay software:
-
Disable Antivirus - Some antivirus programs like AVG, Avast, Norton can slow down the Recorder and Viewer processes. Ensure you disable or uninstall them for optimal performance.
-
Windows Updates - Ensure your Windows Updates are up to date and paused. Open Windows Update in settings, check for updates, and confirm it says "You're up to date."
-
Windows installation is clean - If your computer is a few years old with lots of software, it may impact performance or cause installation issues. Consider a clean Windows installation for optimal functionality.
-
Blackmagic drivers Installation - To check if Blackmagic drivers are installed, search for Blackmagic Media Express software.
If not installed, follow these steps:
- Visit https://www.blackmagicdesign.com/support/family/capture-and-playback.
- Select "Capture and Playback" and download the Windows version of the "Desktop Video" (12.7.1 for this tutorial).
- Unzip the downloaded file and run the installer. Restart your computer.
If already installed, ensure it's the latest version:
- Press the Start menu key, search for programs, and open "Add or remove programs".
- Find the Blackmagic Desktop Video, click on it, and check the version. We recommend version 12.7.1. If older, follow the previous steps to install the latest version.
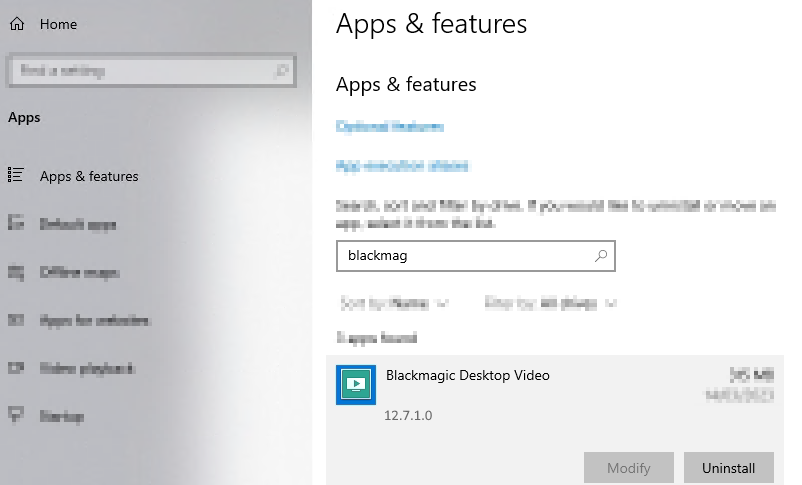
See version 12.7.1.0
Next,
Install and launch the Recorder
Refer to the Recorder guide here.
For this tutorial, install the latest beta version.
Please make sure you read the recorder software installation guide!
Install and launch the Viewer
Refer to the Viewer guide here.
For this tutorial, install the latest beta version.
Please make sure you read the viewer software installation guide!
Recorder Software Setup
After successfully installing and launching the Recorder, follow these steps:
- Create a new session - Name it "d1".
- Register the Recorder - Enter your license key if available; otherwise, a watermark will appear.
- Scenes and Angles - Set up scenes and angles; in this case we will use "Mat 1" and four different angles.
- Video Source - Select the video source for each stream configuration. In our case:
DeckLink Quad 2 on the first configuration,
DeckLink Quad 2 (2) on the second,
DeckLink Quad 2 (3) on the third and
DeckLink Quad 2 (4) on the fourth. - Format and Record to - Set the camera format for each stream configuration (in our case 1080i5994). Also, set Record to drive D for each configuration.
- Open all 4 videos - image should appear for each configuration.
- Menu -> View -> Encoding Configuration - Set the default recording format to 1080 p 5994 and select NVIDIA h.264 encoder, save and close the window.
You should now see something similar to the example below, with images from your cameras.
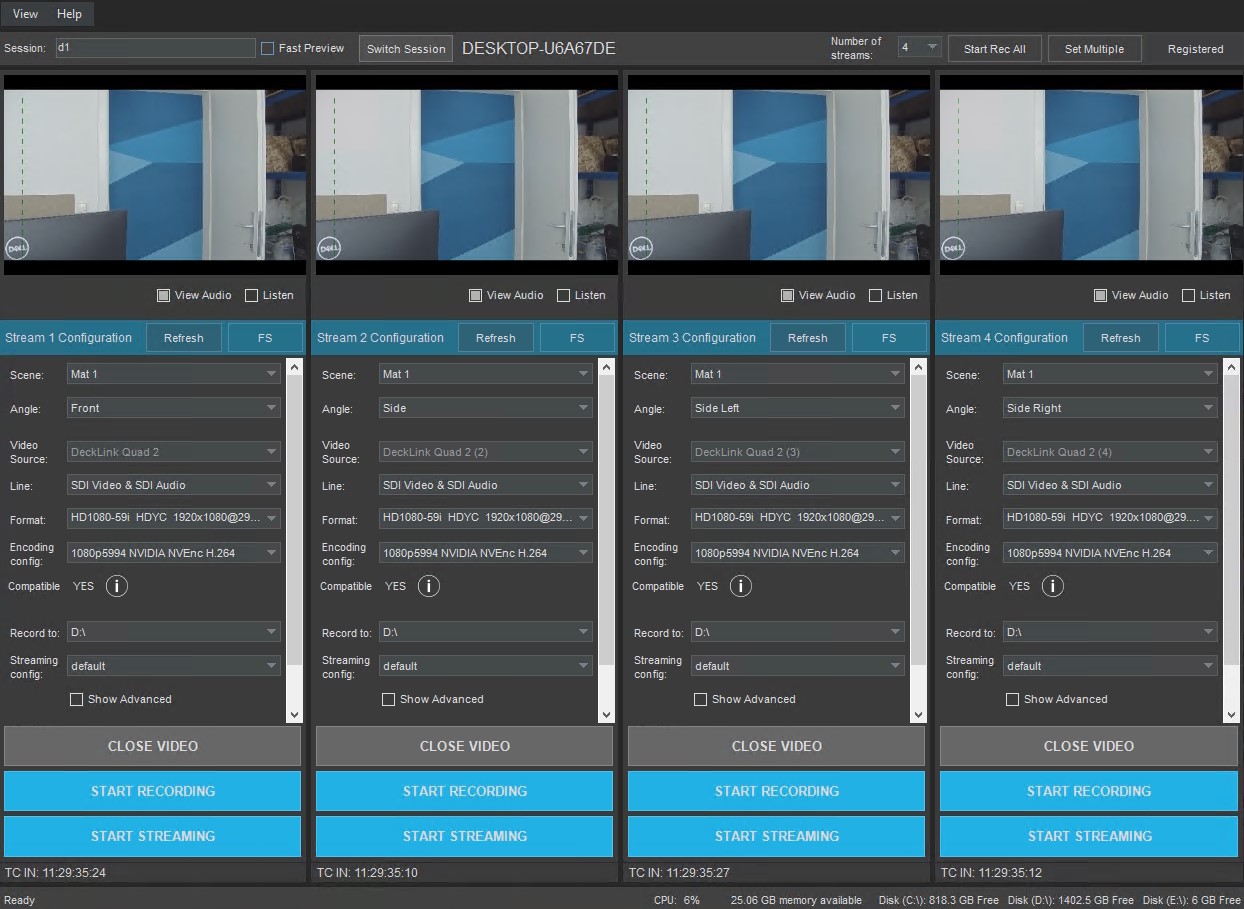
Start recording on all 4.
Viewer Software Setup
Once the Viewer is opened:
- Select Recorder - Choose the recorder, in our case labeled as "THIS-PC".
- Select Session - in our case select the "d1" session.
- Select recordings - Select a recording for each Video source panel (from 1 to 4).
For more details on how to select recordings, refer to How to Select Recordings?.
You should now see the recordings. Press L to jump to live.
- Settings - Click on the Advanced tab and select the Video source quality to Selected_High. You can also set the Live delay to 4 seconds, for example.
Close the settings window.
Congratulations! You should now be able to see four feeds while they are being recorded live on this computer.
Multi computer setup
Most of the setup is exactly the same. It differs in
- connecting both computers to the same network
- making sure to share folders
Hardware setup - multi
Follow guide above to connect signal cables. You will have to make sure that both computers are connected to the same network. For beginners we recommend using Router with DHCP, and connecting switch to router and then clients to switch as displayed in picture below:
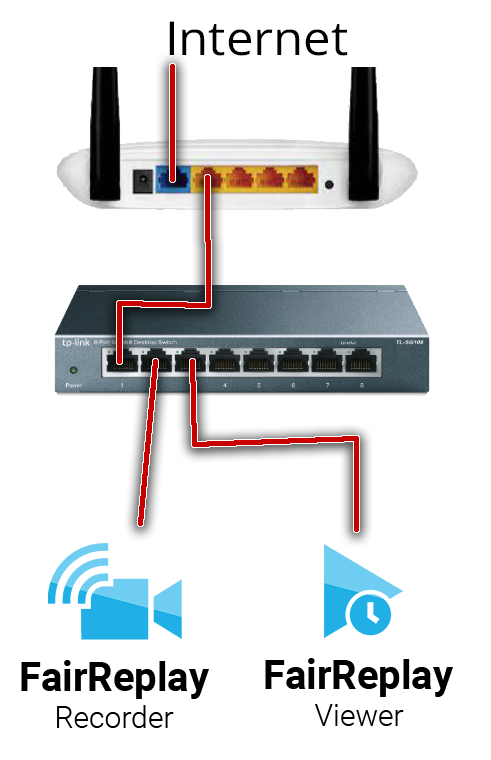
Tp-Link router and switch is used in example. For multiple clients we recommend at least 2.5 Gbps uplink to Recorder. Clients are OK with 1Gbps.