Aida NDI Camera
How to connect and setup AIDA NDI POE camera to work with FairReplay. We will take a look at 2 models


Power
What is POE? It stands for Power over Ethernet. It means network cable can also carry power for device.
Two options are possible. HD-NDI-IP67 needs breakout cable, PTZ-NDI-X20 can receive POE directly to camera.
How to get power into ethernet cable? You have two options
- switch/router that has PoE out capability, for example TP-Link TL-SG108PE. You just need to make sure you plug in into PoE ports and you are done.
- PoE Injector such as Ubiquity U-POE-AF or Tenda PoE30G-AT
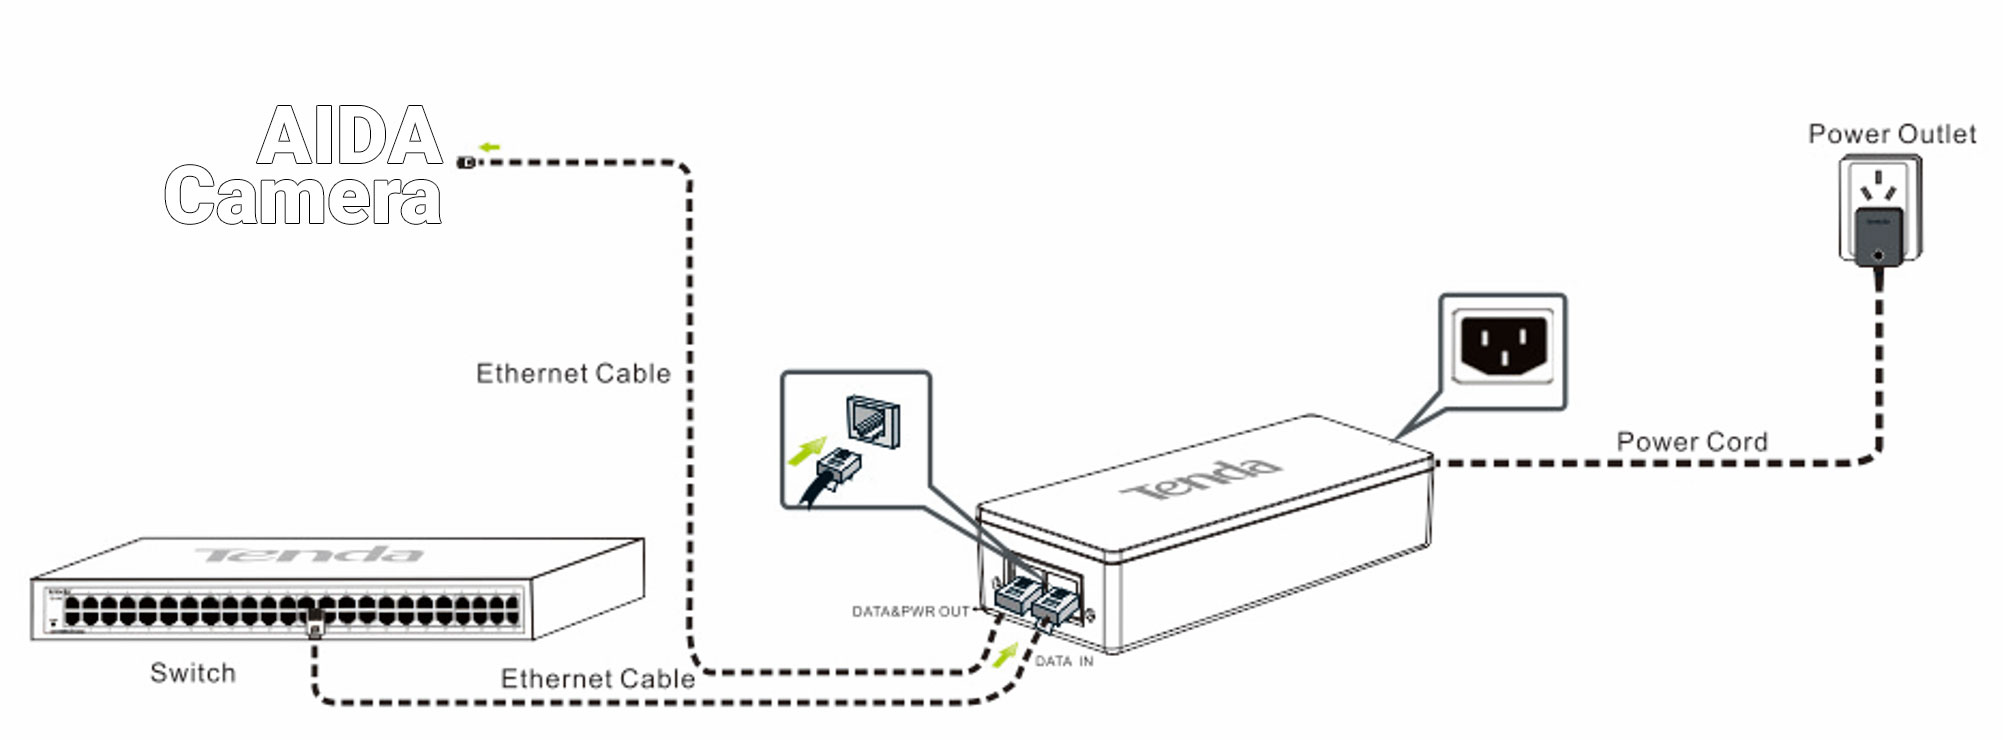
PoE Injectors cabling is
- Ethernet cable from switch is usually Data In
- Power in is usually Euro cable
- Data & PoE Out is ethernet

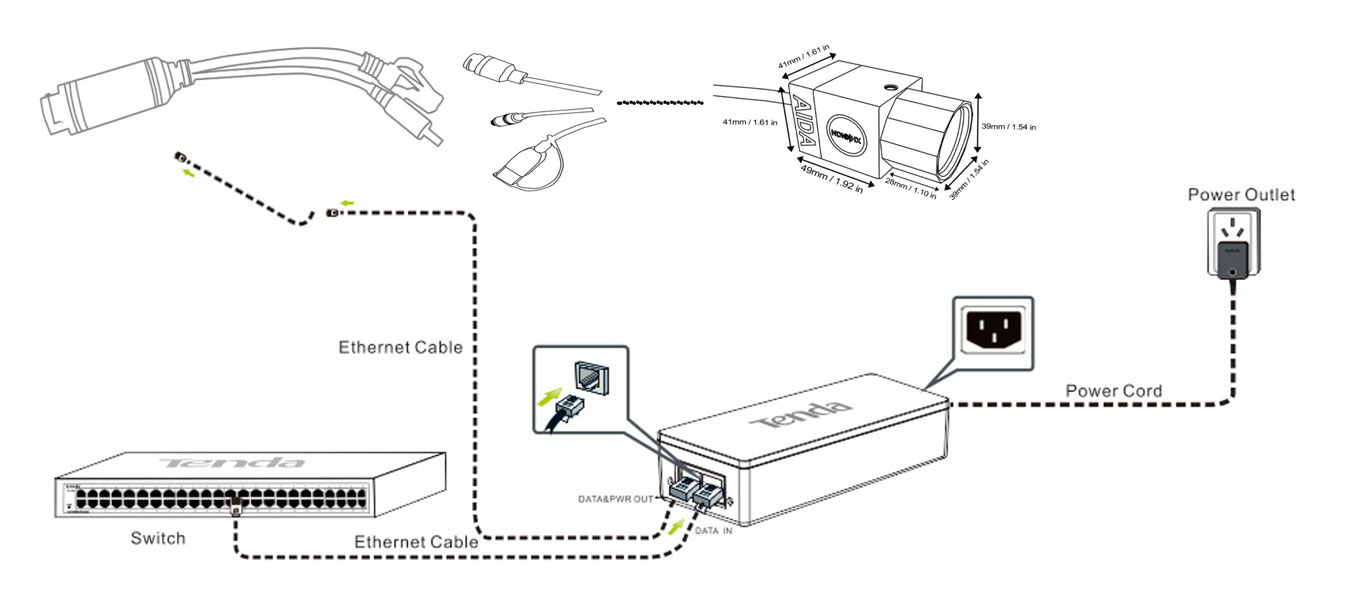
AIDA Breakout cable
This is required for some models, such as HD-NDI-IP67

Complete schema

Network
NDI has two options - Full NDI or NDI|HX. Bitrate for Full NDI is HX is compressed image. Bitrate for Full NDI 1080p50 is ~150 Mbit/s. NDI|HX goes from 3-50 Mbit/s. See this guide for more information.
Make sure all switches are 1Gbit/s (not 100Mbit/s) and that cable to other computers are 1Gbit/s speed, which is usually indicated with Green light.
Make sure to connect and turn on router first, then turn on camera.
Usually when you connect camera for this first time, it gets 192.168.1.188 IP. Navigate to AIDA download page and download AIDA Engineering Tool. This will help you locate cameras in your network.
Notice that computer has IP 172.20.1.14 and camera is in other subnet - 192.168.1.188. This means that camera can not be directly opened for configuration in browser, or from SearchTool.
If your network is already in this range (192.168.1.xyz) skip this step.
For this you will need to do some extra work and change IP of computer to let's say 192.168.1.187. We recommend you are connected to cable (same switch/router as camera) as this will eliminate wi-fi problems.
Open Windows Settings - Network - Select network adapter and then press Edit next to IP Settings
Enter IP as 192.168.1.187 and Subnet 255.255.255.0
Press Save at the bottom. In a few seconds your computer IP should change.
Now you can open 192.168.1.188 and AID configuration should open. Default user/pass is admin and admin
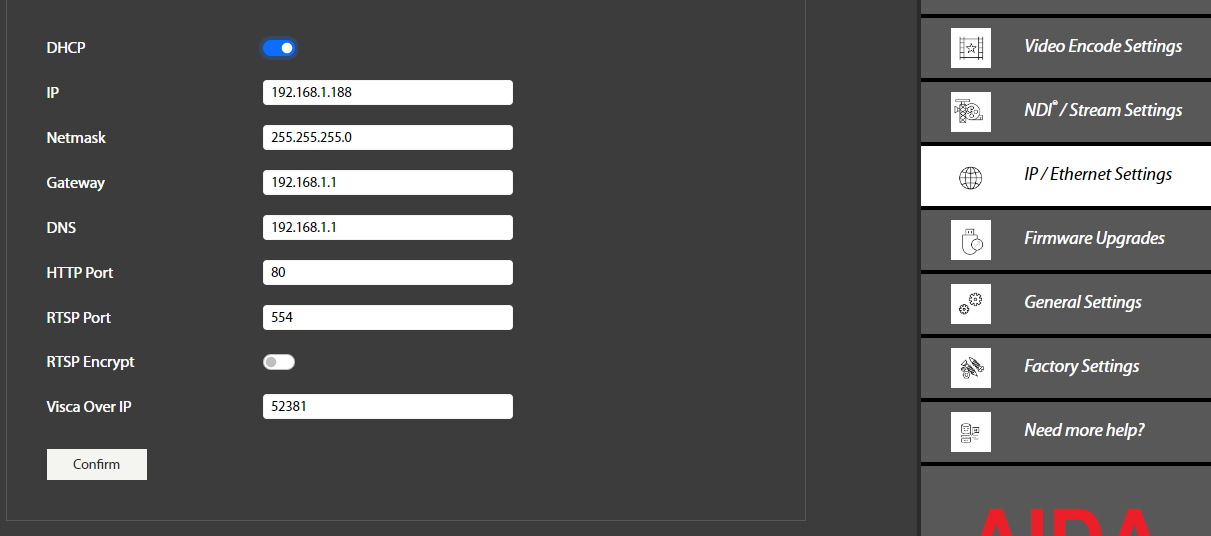
Once you are logged in, press Settings on right side and then select IP/Ethernet settings.

Enable DHCP and press Confirm button.
Restart camera.
Open IP settings of your computer again and select Automatic (DHCP) instead of Manual and press SAVE. Your computer should get back original IP.
You can see camera now got IP 172.20.1.28. NDI Studio Monitor program should now be able to open image.